Cobbles ~ Bike Preparation
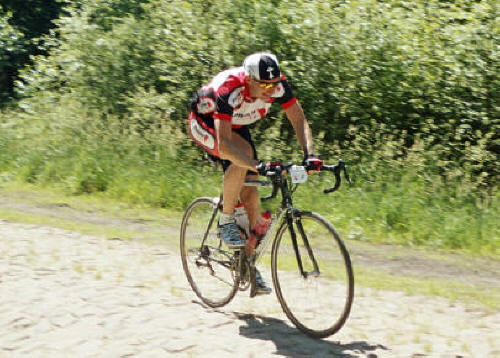
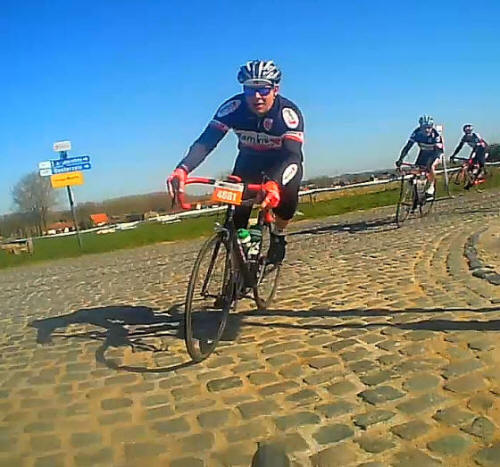
Even in the dry, it all gets a bit squirrily...
Tranche de Arrenberg ~ Paris Roubaix
There are generally two types of riders; those that love the cobbles and those that don't. I'm in the first group, my 50 kilo (ish) wife, Dianne, is in the latter.
In the last twelve years we've each ridden around eighteen cobbled events and covered a couple of thousand kilometres. The only event Dianne never rode was Paris Roubaix, she drove the support car.
In all that time, and in all those kilometres, we've never had a single puncture. Although we (she) did have a fracture de clavicule...

At event HQ, the Eddy Merckx Velodrome
this is before the drugs wore off..
Last year EFR visited Flanders mob-handed for the Peter van Petegem cobbled classic. If you're going to one this year, or any of the many "gravel grinder" events around the world, this is how you can prepare...
There are lots of snippets of information out there on the webesphere, so the important thing is for you to do your research and take all the best bits you can to out what works for you. This is just the stuff I've done and it's served me well. Hopefully it can help you to.
 Contact Points ~ Bum!
Lets
start with the contact points and the
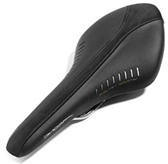
saddle. I
love my fizik Ariones and have them on all my bikes.
Their extra length helps a lot on the cobbles as they give you three distinct seating positions.
For my "race bikes" I have the carbon railed version; for the cobbles I use a "broken in" alloy railed one. You do not want snapped carbon seat rails, or seatpost on the cobbles.
In one Flandrian event I saw a complete seat post, saddle and saddlebag flying towards me on the descent of the cobbled Stationberg. Not sure who was more surprised; me or the rider who'd lost it.
As for shorts, as always, they should be the best you can afford. Never compromise on the comfort of shorts, especially on cobbles. If you'd like a professional short for an amateur price, you could do worse than our very own excellent Decca units, as worn by the Katusha team.
But for me, cobbles are normally ridden in the early, chilly, spring, so Van Hooydonck's it is. They should be compulsory, if riding over the Bosberg!
Contact Points ~ Hands
Bars, should be the same material as the saddle rails, alloy, not carbon.
In almost a hundred European sportives, I've never come down. But I've seen a lot
that have. And it's always concerned me.
You don't want to take a low speed tumble and smack the end of carbon bars then ride them full-gas, seated over the Bosberg or standing up scaling the mighty Molenberg. You might get away with it, but if you don't it ain't gonna be pretty.

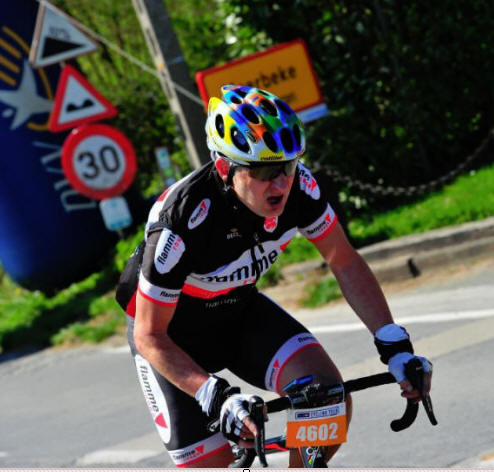
The Mighty Muur ~ Susan Clark attacking Pete
Slattery, who's reacting.
Simon Perchard, cleverly, keeps his powder dry for the Bosberg to come
As for bar tape? I'm a single cover man. Lots of riders "double up" their bar tape. But for me, this changes the contact point and your standard grip on the bars. Our bodies don't like change. I always leave mine.
You don't need double bar tape, because you shouldn't be "gripping" the bars. Some pro's do double up, but they're riding way, way more cobbled kilometres than you, and hit them at 60kph!
You don't see Belgian riders with double bar tape on their bikes.
Not once, ever, have I had blistered hands. A surprising number of my (double-taped) riding buddies have. But then, I do ride a Colnago...
Contact Points ~ Feet
Pedals, there's not a lot you can do with pedals, they are what
they are. But cleats should be
new, but not brand new (see below). And
shoes should be as "average" as you have.
 I've been
doing this for a long time, and have lots and lots of shoes.
I've been
doing this for a long time, and have lots and lots of shoes.
But my "go-to" shoes for the cobbles are my favourite, bog-standard Carnac Quartz.
These were "The Shoe" back around 2002; they're like carpet slippers.
Sadly they're a bit more beaten up than the one in the photo above, but I still love 'em. No fancy carbon soles, no fancy fixing systems. no sticking in an oven to get them to fit. Just plain plastic soles, with four(!) uncomplicated velcro straps.
Carbon soled shoes (especially the latest incarnations) are WAY too stiff and WILL hurt your feet as the day progresses.
I have a pair of super-stiff, Mavic Helium Pro shoes; I have socks that are heavier. But there's no way I would wear them for five hours over cobbles. You cant push hard on the cobbled climbs when you have hot spots on the soles of your feet.
Also, the number of riders I've seen with "neutral service" gaffer tape wrapped around their shoes at the end of an event is a lot more than you'd imagine. Ratchets and boa straps are nice for the pro's and their on-the-go chasseur adjustment; but practical for the normal rider? Nah...
Yep, that hurt!
The double digit steepness, cobbled, Bosberg climb
Wheels & Gears
Obviously, it goes without saying, that you need to make sure you
have the right gear combo's for the terrain you are expecting to
ride. But you really need to take in to account that a 10%
gradient on a "normal" road is nothing like a 10% cobbled gradient.
Add 25-50% "effort" for cobbled climbs, and you'll be in the ballpark. I've ridden all the gear combo's you can imagine. A 39 x 25 will get a "normal" rider up most of the the climbs. Some will be a grind, but you'll get up them, if not at full-gas.
Climbs like the Kopenberg, Paterberg and the Muur, to name but three, may be tackled better on a compact chainset. But don't go too low.
I got duped in to trying a Campag Triple when they first came out (before compacts), I went straight back to a 39 for the next event. You can not "spin" up the cobbles in a 34 x 28. You get nowhere, slowly.
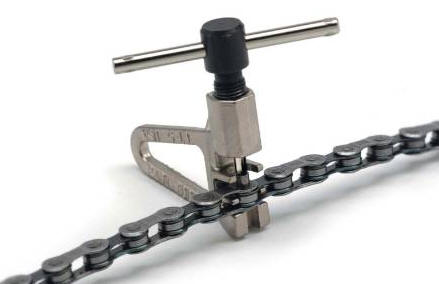
A vital thing to check, is chain length (and stretch). If you change gear clusters, chain rings and/or both, then make sure your chain is the right length to do the job. Especially at the extremes; you don't normally go there, but there might just be an exceptional circumstance.
Get it sorted and keep the chain tight!
Your choice of wheels is as important as the tyres on them. Don't go for your light twelve-spoke wheels and unless you have support. leave the carbons at home. I've seen lots of riders sitting at the side of the road with snapped carbon wheels.
No deep rims, no fancy spoke patterns, just plain old training wheels, the more spokes the better. Break a spoke in a 32 spoke training wheel, no worry; lash it around the others or pull it out.
Break one in a 16 spoke Campag Shamal and you have problems.
Team formation on the Mariaborastraat
Chris O'Prey, Jason Stratford (before below) Mick Heald
Tyres, Tubes & Brakes
There's a lot of stuff on the net about tyre widths; most of it
misguided. People now say "run 27 or 28mm" on cobbles, as this is
what the pros use. Again, they use 27 mm tubs, run at low
pressures to gain traction on cobbles at 50 kph. And they have
a team car, with unlimited numbers, budget, and specially adapted
bikes and forks!
Will there be the clearance in your frame and brakes for 27's? Possibly not. For us, 25 mm should be more than enough, the main reason for wider tyres (for amateurs) is to protect the wheel rim when it drops between cobbles. I've ridden standard 23's before and had no issues, other than a scuffed rim!
I'm lucky enough to have two pairs of matured Schwalbe Stelvios that I "rotate". The rest of the year they sit in a wheel bag in my loft, "maturing" for the next time.
New tyres are slippery and prone to puncture; if you have "old", but not perished tyres (they need to be out of daylight), then look after them and they will last years. Any tyre with a "treaded shoulder" will be perfect. No slicks; trust me, it won't end well.
Take a couple (or three) tubes with you, a repair kit, and gas canisters or a mini pump, depending on your proclivity. It's better to have them and not use them than the alternative. And make sure the valve stems are long enough to fit your rim!
Your saddle bag should also contain a screw on valve extender. Then if you do "use your stock" at least you can make sure you can pump up any "standard" spare, a support car or friendly rider hands out to you.
Also, take three of the best tyre levers you have. I've (stupidly) taken a lightweight pair before now, at the Amstel Gold, and snapped one on the day before recce ride. Don't skimp on tyre levers. It's the small things that trip you up.
Wheels that go around, need stopping. Brakes that look fine today, will disappear rapidly if your cobbled event is wet. Don't take a chance. Get, and fit, new brake blocks for your ride.
Keep your half-worn old ones, they can be put back on when you get back; they'll see you through the summer! Don't go to Flanders with brakes that are sub-optimal. You will regret it.
Don't Bottle It
 Another
crucial item, is your bottle cage.
We could have made a fortune at Roubaix if we'd have set up a bottle
store at the feed stations. I must have seen literally
hundreds of them at the side of the road. I even saw one still
inside it's cage!
Another
crucial item, is your bottle cage.
We could have made a fortune at Roubaix if we'd have set up a bottle
store at the feed stations. I must have seen literally
hundreds of them at the side of the road. I even saw one still
inside it's cage!
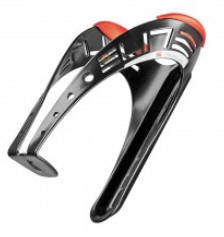
For me, the Elite Patao (alloy) is the best cage you can buy. Cobbles or not. They are solid, grip the bottle well and they don't bend, deform, or crack.
As above, with tyres, in twelve years of cobbles events, I've never lost a bottle. They work wonderfully well.
But just because the bottle is safe in its cage, it doesn't mean the cage is safe on the bike. Make sure your cage bolts are tight (but not overly so) and a trip to your local garage for a tube of Loctite will be well worth the effort; even though you will only need four drops!
And while you're at it, drop some on your stem bolts as well.
Once that's done, get a bit of duct tape, about the size of a postage stamp, and stick it over the bottle cage bolts. Then if they do come loose (they shouldn't) the tape holds the bolts securely in place and allows you to re-tighten them.
Please don't rely on the bottle itself keeping the bolt in place; it won't. If you lose a bottle cage bolt, it's better to jettison it all and put the bottle in your back pocket.
While it's to hand, drop a piece of duct tape across the top of your chain stay. The chain takes a battering and rattling on the cobbles. Don't lose the lacquer on the top of your stay for the price of a strip of tape.
Bits People Forget ~ Chain
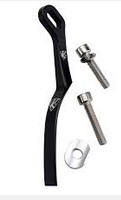 Chain
catchers, especially if you're on a compact (or have a power
meter), are essential.
For less than a tenner, they should be standard fitting on all
bikes.
Chain
catchers, especially if you're on a compact (or have a power
meter), are essential.
For less than a tenner, they should be standard fitting on all
bikes.
If you've travelled to a cobbled event (unless you live in Belgium I'm sure you have), the last thing you want is to unship your chain and (at best) stall, or have it jam between your frame and chain set and cause a DNF at best, a cracked frame at worst.
For the price of a couple of energy bars, you can remove all this stress. Believe me, at some point you will come to the bottom of a climb over geared and have to "rush drop" on to the small chainring and risk unshipping your chain. If you're lucky, you won't...
Then stick a bit of your ubiquitous duct tape on the drive-side chainstay, to protect the frame from chainslap. Cobbles and ribenou cause a lot of slappery twixt steel and carbon.
Bits People Forget ~ Saddle Bag
If you have a saddle bag, do not rely on the manufacturers fixing
system. Get yourself an old fashioned toe
strap and use it to secure the bag to the saddle rails.
(Here's my Colnago C50 at the start of Roubaix.)
 Another way to pass the time on a cobbled classic is to count the
saddle bags in the gutter.
Another way to pass the time on a cobbled classic is to count the
saddle bags in the gutter.
The saddle bag should contain your tubes, gas cannisters, repair kit, tyre levers, a chain "quick-link", latex gloves, and a plastic bag with a ten euro note (emergency money and/or life saver tyre boot).
Don't forget to include a clean rag for your hands inside the bag. It will also double up as a noise insulator and take up all that extra, rattly, bag space.
It may sound trivial, but, as you smash over the cobbles, there is nothing worse than a rattling saddle bag.
Also, make sure you have allen keys that fit your bars, stem, seat post, saddle and bottle cage! It's so much better to be looking at them rather than for them.
Power Meter User?
If you have an SRM or Quarq, they rely on a
sensor magnet being attached to the frame. This can be
the cause of two HUGE issues.
If you unship your chain, it will "jump" to the magnet and will, almost always, not allow you to get the chain re-mounted without stopping. Which is why the chain catcher above is essential is you have a power meter magnet attached.
But the main concern with these magnets, is their ability to become "detached". If they do, hopefully they will fall groundwards and all that happens is you lose your power reading.
I'm aware of two riders I know that haven't been so lucky. The magnet can detach itself and jump straight to the nearest metal mass, which is your chain. Where it sits.
Until it comes in to contact (at 100 rpm, a third of a second later) with your rear mech. It gets very, very messy, very, very quickly.
So while you're taping up your bottle cage bosses, take the time to upturn the bike and make sure you secure the magnet with enough duct tape to make sure, even if it should become detached, it can't find it's way to your chain. Two minute job, max.
And if you're on a L'Eroica, Tro Bro, or just plain French roads event; drop a length of duct tape down the underside of your downtube to protect the lacquer. Ruined a good frame that way once, by coming up to a three K section of that gritted road. The noise off the frame was heartbreaking...
Lastminute.com
 If you are changing anything on your bike, including any of the
above contact point stuff, you do it TWO WEEKS BEFORE you travel.
If you are changing anything on your bike, including any of the
above contact point stuff, you do it TWO WEEKS BEFORE you travel.
Take the time to make sure stuff works and is bedded in. Don't change anything the day before you go away, and definitely not without test riding it first. And I mean a "proper" test ride; 50 kms at least, not just a ride around the block.
Time goes quicker than you think, don't waste it, or save it for later. Your time will run out before you know it.
And here's why...
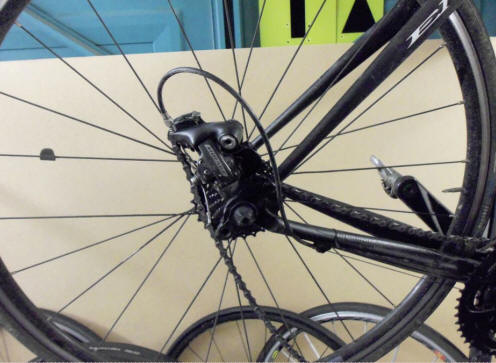
Fitted a new chain and prepped the E1 for Flanders and took her out the week before we went. Fifty metres from my house, I gave it a "full-gas", small gear attack, on a Molenberg-type climb; BANG!
The rear mech picked up, turned itself inside out which resulted in a short walk home! Time for plan B. The C59...
Sadly, for Jason (second left) his rear mech decided to explode on the Steenbeekdries climb, even worse than the one above...
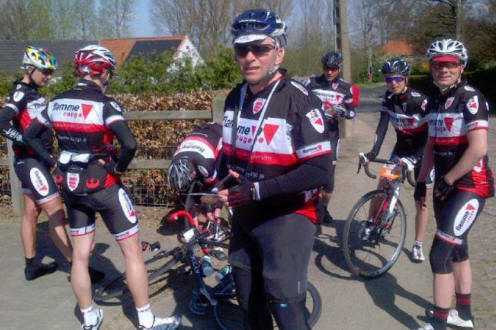
Half the team trying to fix the unfixable, the other half
looking the 20 metres to the top of the climb for a neutral service
car...
So there we have it. Front to back, top to bottom. Prepare your bike well and it will look after you. All you need to do now is decide where you're going to attack and which beer you will reward yourself with at the finish.
Have fun, keep safe, hup, hup, hup...

we even made the Tro Bro official vid..
The Bike Checklist
Saddle ~ alloy
Saddle bag ~ full and toe-strapped in place
Bars ~ alloy with single wrap tape
Shoes ~ comfy and plastic soled
Wheels ~ strong but compliant (training wheels)
valve extender if needed
Tyres ~ 25 mm and "broken in"
Tubes ~ one more than you think you need (and repair kit!)
Brakes ~ new blocks
Bottle Cages ~ alloy, duct-taped
Chain ~ fit catcher
Cadence magnet ~ duct taped
Frame ~ chainstay and downtube duct-taped